Using the Lancet Device for the GKI Meter
- Last updated September 3, 2019
Preparing the Lancing Device
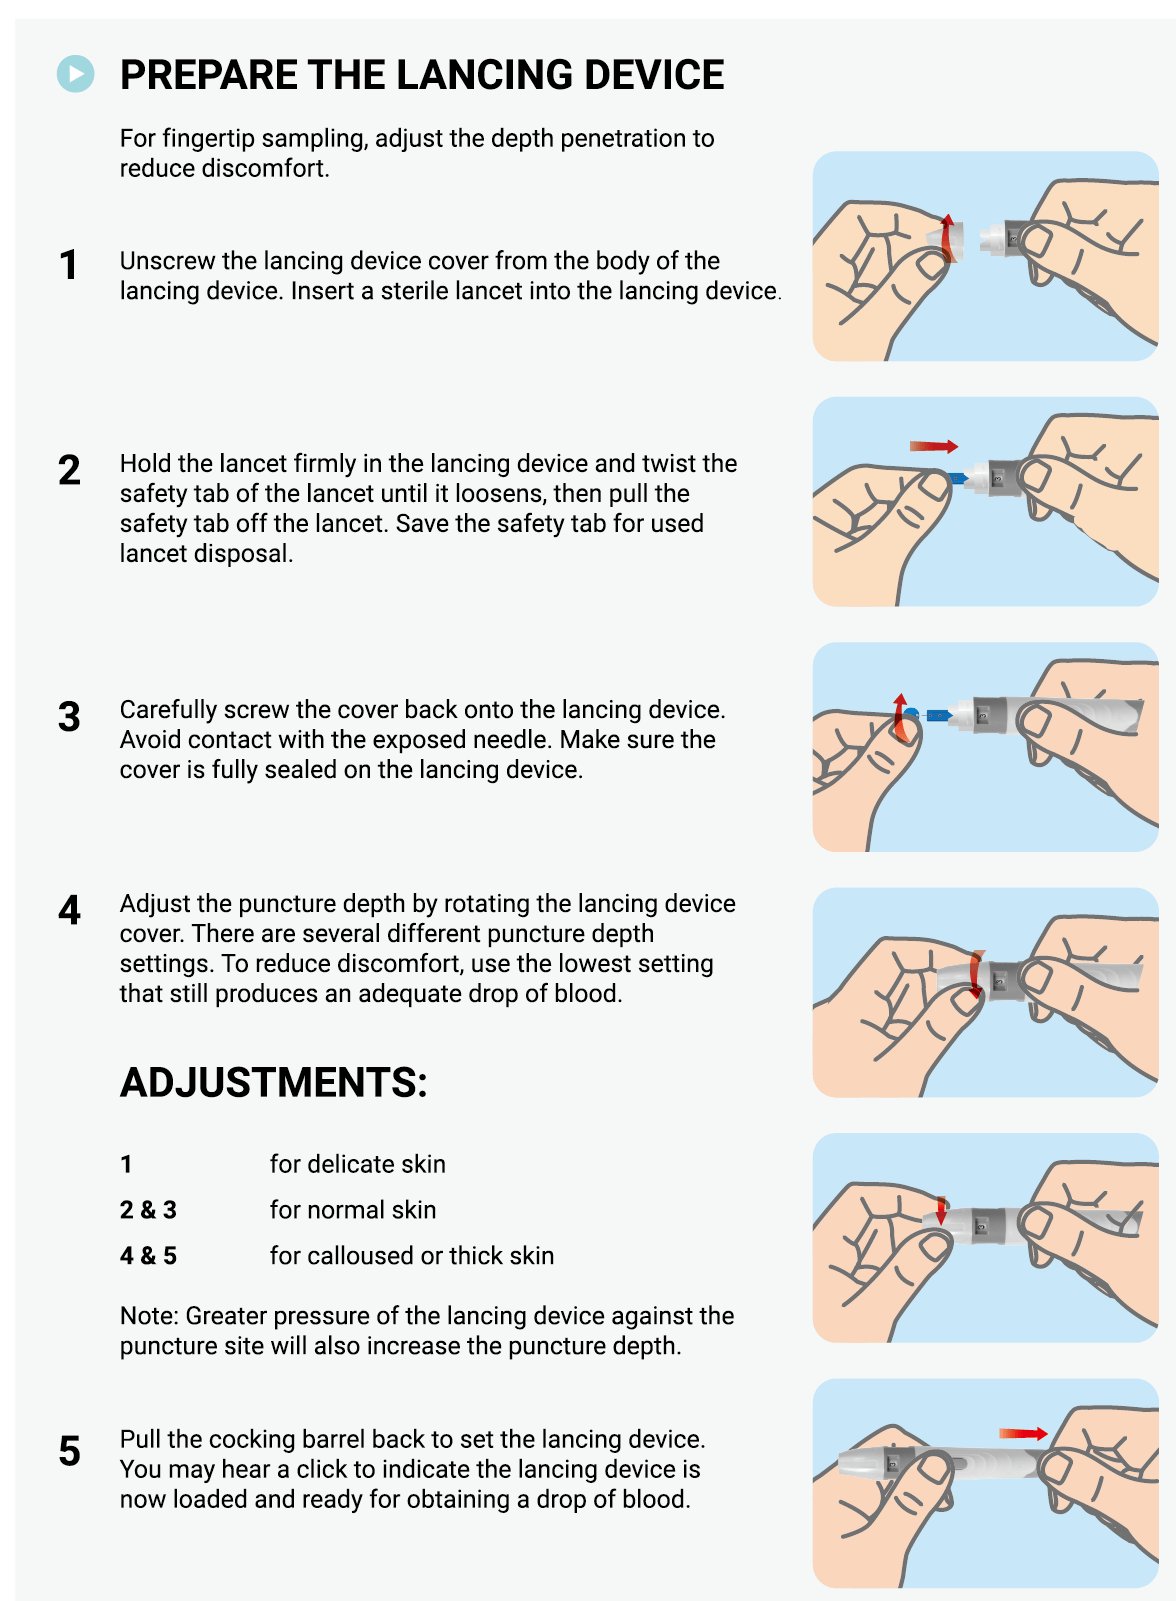
- Unscrew the lancing device cover from the body of the lancing device. Insert a sterile lancet into the lancing device and push it in until the lancet comes to a complete stop in the lancing device.
- Hold the lancet firmly in the lancing device and twist the safety tab of the lancet until it loosens, then pull the safety tab off the lancet. Save the safety tab for disposing of the previously used lancet.
- Carefully screw the cover back onto the lancing device. Avoiding contact with the exposed needle. Make sure the cover is fully sealed on the lancing device.
- Adjust the puncture depth by rotating the lancing device cover. There are several different puncture depth settings. To reduce the discomfort, use the lowest setting that still produces an adequate drop of blood.
- 1 for delicate skin
- 2 and 3 for normal skin
- 4 and 5 for calloused or thick skin
- Note: Greater pressure of the lancing device against the puncture site will also increase the puncture depth.
Activate the Lancing Device
- Pull the cocking barrel back to set the lancing device. You may hear a click to indicate the lancing device is now loaded and ready for firing.
- Press the lancing device against the side of the finger to be lanced with the cover resting on the finger. Push the release button to prick your fingertip. You should hear a click as the lancing device activates.
- Adjust the puncture depth if necessary.


Sign up for our weekly newsletters and receive our keto recipe eBook.
From new research findings and articles to outstanding keto recipes, we deliver the top keto news and recipes straight to you!


